Showing posts with label gadgets. Show all posts

Friday, April 5, 2013

gadget--4

How To Add jQuery Thumbnail Hover/Zoom Effect to blogger images

1.Login to your blogger dashboard--> layout- -> Edit HTML
2.Don't Click on "Expand Widget Templates"
3.Scroll down to where you see ]]></b:skin> tag:
4.Copy below code and paste it just before the ]]></b:skin> tag.
ul.thumb {
float: left;
list-style: none;
margin: 0; padding: 10px;
width: 360px;
}
ul.thumb li {
margin: 0; padding: 5px;
float: left;
position: relative;  /* Set the absolute positioning base coordinate */
width: 110px;
height: 110px;
}
ul.thumb li img {
width: 100px; height: 100px; /* Set the small thumbnail size */
-ms-interpolation-mode: bicubic; /* IE Fix for Bicubic Scaling */
border: 1px solid #ddd;
padding: 5px;
background: #f0f0f0;
position: absolute;
left: 0; top: 0;
}
ul.thumb li img.hover {
background:url(https://blogger.googleusercontent.com/img/b/R29vZ2xl/AVvXsEi8At2tzoeb_GSYg2XAEo5Pbu_CK01cxh_5aNU416j9-K6Zo3itFOgBJVTssJjTx2IR2d-5A5p7tk_q9dccxua1Wmt8faCtbSpJXeItKRzfE76KSaNTVNOmLdTKC7pK7NsirmjqhPdng4Cz/) no-repeat center center;  /* Image used as background on hover effect
border: none; /* Get rid of border on hover */
}
Note : Please host 'thumb_bg.png' image yourself.
5.Scroll down to where you see </head> tag:
6.Copy below code and paste it just before the </head> tag.
<script src='http://code.jquery.com/jquery-latest.js' type='text/javascript'/>
<script type='text/javascript'>
$(document).ready(function(){

//Larger thumbnail preview

$(&quot;ul.thumb li&quot;).hover(function() {
$(this).css({&#39;z-index&#39; : &#39;10&#39;});
$(this).find(&#39;img&#39;).addClass(&quot;hover&quot;).stop()
 .animate({
  marginTop: &#39;-110px&#39;,
  marginLeft: &#39;-110px&#39;,
  top: &#39;50%&#39;,
  left: &#39;50%&#39;,
  width: &#39;174px&#39;,
  height: &#39;174px&#39;,
  padding: &#39;20px&#39;
 }, 200);

} , function() {
$(this).css({&#39;z-index&#39; : &#39;0&#39;});
$(this).find(&#39;img&#39;).removeClass(&quot;hover&quot;).stop()
 .animate({
  marginTop: &#39;0&#39;,
  marginLeft: &#39;0&#39;,
  top: &#39;0&#39;,
  left: &#39;0&#39;,
  width: &#39;100px&#39;,
  height: &#39;100px&#39;,
  padding: &#39;5px&#39;
 }, 400);
});

//Swap Image on Click
$(&quot;ul.thumb li a&quot;).click(function() {

 var mainImage = $(this).attr(&quot;href&quot;); //Find Image Name
 $(&quot;#main_view img&quot;).attr({ src: mainImage });
 return false; 
});

});
</script>
7.Now Click on "Save Templates"
8.Now go to Layout-->page elements and Click on 'Add a Gadget'.
9.Now Select 'HTML/Javascript' and add the code given below and click save.
<ul class="thumb">
<li><a href="#"><img src="picture1 Link" alt="" /></a></li>
<li><a href="#"><img src="picture2 Link" alt="" /></a></li>
<li><a href="#"><img src="picture3 Link" alt="" /></a></li>
<li><a href="#"><img src="picture4 Link" alt="" /></a></li>
<li><a href="#"><img src="picture5 Link" alt="" /></a></li>
</ul>
Note : Replace picture1 Link,picture2 Link,picture3 Link,picture4 Link,picture5 Link,..... with your images links.

 ==============================================


How to remove Labels number (counter)

October 26, 2008

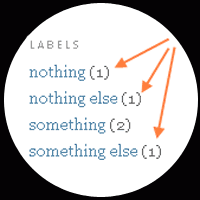
In default Blogger templates, in your Label list, you can see the counter (number) beside each label. If you would like to get rid of this, read on. It takes a minute....

Ok. Let's remove them. Before you do anything Back up your template.
Go to:
DASHBOARD ► LAYOUT ► EDIT HTML ► click on EXPAND WIDGET TEMPLATES in the upper right corner:


You have to find the following line of code:
(<data:label.count/>)
Delete it. Save the Template. View your Blog. Ta-dam!


Smile!

 =============================================


gadgets-3

How To Add Scrolling Text to Status Bar

1.Login to your blogger dashboard and go to Layout --> Page Elements.
2.Click on 'Add a Gadget' on the sidebar.
3.Select 'HTML/Javascript' and add the one of code given below and click save.
<script language=javascript>
function statusbar(val)
{
var msg  = "TYPE-YOUR-MESSAGE-HERE";
var res = " ";
var speed = 100;
var pos = val;

if (pos > 0) {
for (var position=0 ; position< pos; position++) {
 res += " ";
}
res+=msg;
pos--;
window.status = res;
timer = window.setTimeout("statusbar("+pos+")",speed);
}
else{
if( -pos < msg.length) {
 res += msg.substring(-pos,msg.length);
 pos--;
 window.status=res;
 timer = window.setTimeout("statusbar("+pos+")",speed);
}
else
{
 window.status= " ";
 timer = window.setTimeout("statusbar(100)",speed);
}
}
}
statusbar(100);
</script>
Now you are done.
===============================================


How To Add Random,Rotating Images for Blogger Header

In this tutorial I am going to explain how to add random,rotating images for your blogger header background.When after you adding this feature to your blogger blog,header image of your blog will rotate/change in each page refresh.Before doing this trick you must create header images for your blog.In this tutorial I am going to show how to rotate 5 header images.
1.Log in to your dashboard--> Design- -> Edit HTML
2.Scroll down to where you see <body> tag.
3.Now copy below code and paste it just after the <body> tag.
<script type='text/javascript'>

var HeaderImage= new Array()

HeaderImage[0]=&quot;URL-OF-HEADER-IMAGE-1&quot;
HeaderImage[1]=&quot;URL-OF-HEADER-IMAGE-2&quot;
HeaderImage[2]=&quot;URL-OF-HEADER-IMAGE-3&quot;
HeaderImage[3]=&quot;URL-OF-HEADER-IMAGE-4&quot;
HeaderImage[4]=&quot;URL-OF-HEADER-IMAGE-5&quot;
var random=Math.round(4*Math.random());

document.write(&quot;<style>&quot;);
document.write(&quot;#header-wrapper {&quot;);
document.write(&#39; background:url(&quot;&#39; + HeaderImage[random] + &#39;&quot;) no-repeat left TOP;&#39;);
document.write(&quot; }&quot;);
document.write(&quot;</style>&quot;);

</script>
NOTE :
Replace "URL-OF-HEADER-IMAGE-X" with your image URLs.
If above code doesn't work for your blog,then replace "#header-wrapper" with "#header".(ID or Class of your header section).
You can add different number of images than 5.But remember to change "4*Math.random()" according to the number of images you add.For example,when you want to add 8 different images for your blog header background, then code should be change as "7*Math.random()".Look at the example below:
<script type='text/javascript'>

var HeaderImage= new Array()

HeaderImage[0]=&quot;URL-OF-HEADER-IMAGE-1&quot;
HeaderImage[1]=&quot;URL-OF-HEADER-IMAGE-2&quot;
HeaderImage[2]=&quot;URL-OF-HEADER-IMAGE-3&quot;
HeaderImage[3]=&quot;URL-OF-HEADER-IMAGE-4&quot;
HeaderImage[4]=&quot;URL-OF-HEADER-IMAGE-5&quot;
HeaderImage[4]=&quot;URL-OF-HEADER-IMAGE-6&quot;
HeaderImage[4]=&quot;URL-OF-HEADER-IMAGE-7&quot;
HeaderImage[4]=&quot;URL-OF-HEADER-IMAGE-8&quot;
var random=Math.round(7*Math.random());

document.write(&quot;<style>&quot;);
document.write(&quot;#header-wrapper {&quot;);
document.write(&#39; background:url(&quot;&#39; + HeaderImage[random] + &#39;&quot;) no-repeat left TOP;&#39;);
document.write(&quot; }&quot;);
document.write(&quot;</style>&quot;);

</script>
4.Now save your template and your done.Refresh your site few times to see the result.Your header image will be rotate.


 ==============================================


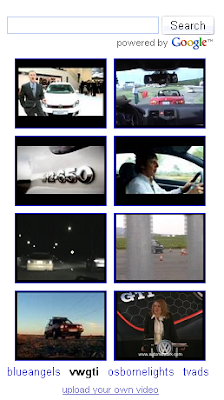
How To Add Google Video Search to blogger

1.First go to Google Video Search Wizard.
2.Now Customize your video search bar.

3.Enter your blog URL.

4.Click on generate code.

5.Now copy generated code.

6.Login to your blogger dashboard--> layout- ->Page Elements
7.Click on 'Add a Gadget' on the sidebar.
8.Select 'HTML/Javascript' and add your video search bar code and click save.
Now you are done.


 =======================================


How To Add jQuery Image Zooming To Blogger

1.Login to your blogger dashboard--> layout- -> Edit HTML
2.Scroll down to where you see ]]></b:skin> tag .
3.Copy below code and paste it just after the ]]></b:skin> tag.
jQuery Image Zooming
<script src='jquery.js' type='text/javascript'/>
<script src='jquery.jqzoom.js' type='text/javascript'/>
<script type='text/javascript'>
jQuery.noConflict();
jQuery(document).ready(function(){
$(&quot;img.jqzoom&quot;).jqueryzoom({
 xzoom: 200, //zooming div default width(default width value is 200)
 yzoom: 200, //zooming div default width(default height value is 200)
 offset: 10 //zooming div default offset(default offset value is 10)
 //position: &quot;right&quot; //zooming div position(default position value is &quot;right&quot;)
});
});
</script>

<style type='text/css'>
div.zoomdiv {
z-index                 : 100;
position                : absolute;
top:0px;
left:0px;
width                   : 200px;
height                  : 200px;
background: #ffffff;
border:1px solid #CCCCCC;
display:none;
text-align: center;
overflow: hidden;

}

img.jqzoom{
cursor:crosshair;
position:relative;

}
</style>
Important !!! : Download jquery.js and jquery.jqzoom.js as a zip file from here and host jquery.js and jquery.jqzoom.js yourself.
4.Now save your template.
5.Go to Layout--&gt;Page Elements and click on "Add a gadget".
6.Select "html/java script" and add the code given below and click save.
<span class="tozoom"><img alt="LARGE-IMAGE-ADDRESS" src="SMALL-IMAGE-ADDRESS" class="jqzoom"/></span>
Look at the example below.
<span class="tozoom"><img alt="https://blogger.googleusercontent.com/img/b/R29vZ2xl/AVvXsEiStfuPbwwY1wOkjouVNojxYt8xi1b-TrglhYbWIlwnPStoZfx6nrezSVuSzhFt3mnv19CNsQvyeD3-Vw2jQHkxL377Ep470wwIJ-zXJ7I2JxlJLiWq0P6R1L1oBbQwS-FgBtfDi0rwnQ5b/+Zoom+Image+big.jpeg" src="https://blogger.googleusercontent.com/img/b/R29vZ2xl/AVvXsEjrW5ukqlMYkkCCxqOO79Lw6pOUcrj6M-ca9NdSp-P6IykvuTVwsBXdzCfJ11GBqgbHexp71GeXnpx-sInPyY_yOhS6eQlavaQxuskh3zROSnwWFUHimDw63DfNZnF_vr5FM7mM_Q-ODuOf/+Zoom+Image+small.jpg" class="jqzoom"/></span>
You are done.


==========================================


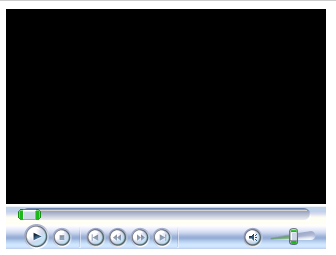
How To Embed Windows Media Player to blogger

1.Login to your dashboard--> layout- ->Page Elements
2.Click on 'Add a Gadget'.
3.Select 'HTML/Javascript' and add the code given below and click save.

<embed type="application/x-mplayer2" pluginspage="http://www.microsoft.com/Windows/MediaPlayer/" name="mediaplayer1" ShowStatusBar="true" EnableContextMenu="false" autostart="false" width="320" height="240" loop="false" src="YOUR-VIDEO-FILE-LINK" />
Note : Remember to replace YOUR-VIDEO-FILE-LINK with real link of a video file you like.

Instruction Video:

Thanks to create this video : baronvg


 ==============================================


gadgets-2

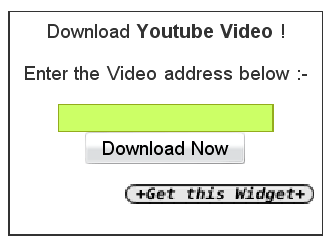
How To Add Youtube Video Downloader to blogger

1.Login to your dashboard--> layout- ->Page Elements
2.Click on 'Add a Gadget' on the sidebar.
3.Select 'HTML/Javascript' and add the code given below and click save.

<script src="http://downloadutube.googlepages.com/ytdwid.js" type="text/javascript"></script>
<a href="http://technojuice.blogspot.com/2007/11/download-youtube-video-widget-blogger.html"><img border="0" alt="Download youtube Video" width="5" src="http://i197.photobucket.com/albums/aa309/technojuiceblog/blank.gif" height="5" />
</a>
Now you are done.I found this tip in http://technojuice.blogspot.com .
Look at the picture below.


 =============================================

How To Show Blogger Widgets in Specific Blog Post URL Only.Log in to your dashboard--> layout- ->Page Elements 
2.Click on Add a Gadget on the sidebar. select the type of gadget you need and Save the Changes.Now you can see it top of the sidebar.
    For example I add a HTML/Javascript gadget to my sidebar.

3.Now go to Edit HTML."Without Expanding Widget Templates" Scroll down to where you see like this :

4.Copy the name of the first widget. In my case it is HTML2.
5.Now click on "Expand Widget Templates" and search the name you have copied in the above step.(In my case it is HTML2)

6.Copy and paste  <b:if cond='data:blog.url == "Blog Post URL"'>  and </b:if> , EXACTLY at the same place as shown in the image below.

NOTE : Remember to REPLACE  Blog Post URL with your real post url to want to show your widget.
7.Now save your template and you are done.


 ============================================
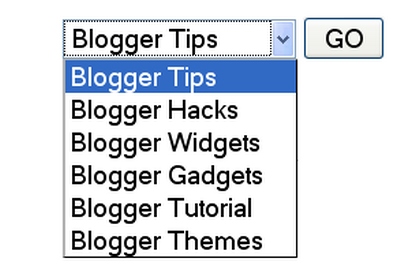
How To Create Drop Down Menu Form with GO Button


1.Log in to your dashboard--> layout- ->Page Elements
2.Click on 'Add a Gadget' on the sidebar.
3.Select 'HTML/Javascript' and add the code given below and click save.
<form name="jump">
<select name="menu">
<option value='URL link 1 here' > Name 1</option>
<option value='URL link 2 here' > Name 2</option>
<option value='URL link 3 here' > Name 3</option>
<option value='URL link 4 here' > Name 4</option>
<option value='URL link 5 here' > Name 5</option>
<option value='URL link 6 here' > Name 6</option>
</select>
<input type="button" onClick="location=document.jump.menu.options[document.jump.menu.selectedIndex].value;" value="GO">
</form>
NOTE : Remember to Replace GO , URL link X here , Name X with your choices.
Now you are done.


===============================================
How to Add “Save Page as PDF” button to Blogger blog

1.First Sign up with Web2PDF.
2.Now Configure your "Save Page as PDF" button and click "Generate the JavaScript" button.
3.Then a Javascript code will be generated. Copy This code.
Now follow these simple steps :
(a)Log in to your dashboard--> layout- -> Edit HTML
(b)Click on "Expand Widget Templates"
(c)Scroll down to where you see this:
<data:post.body/>
(d)Immediately after above line, paste the code which you have generated at the Web2Pdf Online website. It's look like below code:
<!-- START: PDF Online Script -->
<script type="text/javascript">
var authorId = "XXXXXXXX-XXXX-XXXX-XXX-XXXXXXX";
var pageOrientation = "0";
var topMargin = "0.5";
var bottomMargin = "0.5";
var leftMargin = "0.5";
var rightMargin = "0.5";
</script>
<script type="text/javascript" src="http://web2.pdfonline.com/pdfonline/pdfonline.js">
</script>
<!-- END: PDF Online Script -->
(e)Click on "Save Templates" and Refresh your site.


===============================================


How To Add Disqus Comment System to Blogger

DISQUS is a comments platform that helps you build an active community from your website's audience. It has awesome features, powerful tools, and it's easy to install.Before this I have explain how to add IntenseDebate comment system to blogger blog and now I am going to explain how to add Disqus comment system to your blogger blog.
There are lot of good features with Disqus comment system when we comparing it with Blogger default comment system.
Realtime comment system
Comments become more like live discussions with realtime posting and updating. By offering a faster, more intuitive experience, Disqus is everyone's favorite way to comment.
Notification and reply system
The notification system lets people know when they've received a response. Best of all, they can continue the conversation straight from the email.
Inline media embedding
Full integration with media services such as Youtube, Flickr, and more. Attach media such as photos and videos right within the comments.
Mobile commenting
Fully compatible with mobile websites for commenting while on the go. The default mobile theme is formatted with smartphones, like the iPhone or Android phones, in mind.
Social integration
Full integration with Facebook, Twitter, and more. Let people login, comment, and share using social services they already use and love.
The Community Box
A quick way to show off what your community is made up of. The community box gives everyone a summary view of the activity and people participating on the site.
Liking and sharing
People can rate what they like by liking pages or comments and then sharing that on Facebook, Twitter, and other networks.
Moderation tools
Powerful and easy-to-use tools helps you keep your community under control. The moderation panel is designed for managing a large volume of incoming comments.
Spam-Be-Gone
Our in-house anti-spam technology keeps spam and unsavory people out of your community. Our anti-spam continually learns from the rest of the Disqus network to keep your site safe.
Mobile apps
Disqus apps are available for the iPhone, Android, and webOS phones. Manage your communities while you're on the go with these freely available apps.
Blacklists and whitelists
Make daily moderation easier with granular control over who gets to contribute within the community. Disqus gives you powerful tools such as blacklists, whitelists, and word filtering.
Import and export
Import existing comments into Disqus and sync up your data. All data is completely portable and can be exported at any time.
International languages
Disqus supports dozens of languages in addition to English. Complete your integration with native language support.
SEO-friendly and local sync
We offer plugins and integration methods that ensure compatibility with search engines.
Theme customization
Customize with CSS to smooth out the integration with your website. Or, use our advanced theme editor to craft your own custom theme.
Tweets and reactions
Disqus brings the conversation back to your site by collecting Tweets, mentions, and other reactions from around the web.
Profile management
Commenters control their personas and reputation across the different communities they participate on. Disqus makes it easy to track and keep conversations together.
Activity streams
Audiences stay engaged with insight into others' activity all over the web. Integrated activity streams let people see where else the smart people are talking.
Connected communities
Disqus reaches 200 million people every month across half a million websites and communities on the web. Keep the conversations lively by connecting your audience with the millions of others already on Disqus.
Before follow the instruction given below,
(a) Login to your Blogger Account.
(b) Backup your blogger template.
(c) Make sure that your blog is using Blogger Layouts. See upgrade instructions if not.
(d) Enable commenting. See instructions to enable commenting. Make sure that Who Can Comment? is set to Anyone.
Now Follow the steps given below. You can add Disqus comment system to your blog easily.
1. First create a account on Disqus.com.
2. Now visit this link to add your blog to the Disqus account:
http://disqus.com/admin/register/
3. Fill in the necessary details and click on "Continue".


 ============================================